


Gyprock
Gyprocking, also known as drywalling or plasterboard installation, is a fundamental aspect of modern construction and interior design. This versatile material offers an efficient, cost-effective, and aesthetically pleasing solution for creating smooth, even walls and ceilings.
Whether you're renovating your home or working on a commercial project, gyprocking can significantly enhance the overall appearance and functionality of your space — we’ll cover everything you need to know below.
Overview
- Benefits of Gyprocking
- Types of Gyprocking Materials
- Tools and Equipment
- Gyprock Installation Process
- How much does gyprocking cost?
- Tips and Techniques
- Common Problems
- Choosing a contractor
- FAQs
Benefits of Gyprocking
Gyprocking is an essential part of interior finishing in construction projects for various reasons. Firstly, it creates a smooth surface, hiding imperfections and offering a blank canvas for painting and decorating.
It also offers fire-resistant, moisture-resistant, and soundproofing properties, making it suitable for specific areas like bathrooms, kitchens, and entertainment rooms. Gyprock is relatively quick to install, reducing construction time and labour costs.
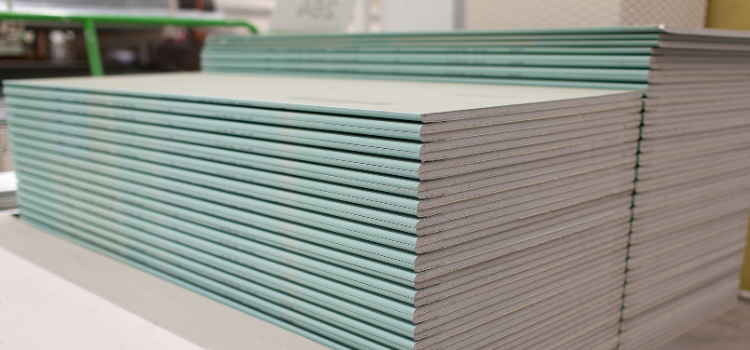
Types of Gyprocking Materials
Standard Plasterboard
Standard plasterboard is the most commonly used gyprocking material. It comes in various thicknesses, with a range of gyprock sheet sizes to accommodate different construction needs. Its cost-effectiveness and ease of installation make it a preferred choice for general applications.
Specialty Plasterboard
Specialty plasterboards are engineered for specific purposes, offering enhanced performance in particular environments. Moisture-resistant plasterboard is ideal for damp areas like bathrooms and kitchens, while fire-resistant plasterboard adds an extra layer of safety in high-risk areas. Soundproofing plasterboard helps minimise noise transmission between rooms, providing acoustic benefits.
Impact-Resistant Plasterboard
Designed to withstand more substantial force, impact-resistant plasterboard is suitable for areas prone to potential damage, such as hallways, corridors, and playrooms. Its durability helps protect walls from dents and dings caused by accidental collisions.
Gyprocking Tools and Equipment
A successful gyprocking project relies on having the right tools and equipment. Here are some essential items you'll need:
Basic Tools
- Tape measure: For accurate measurements of the plasterboard panels.
- Utility knife: To cut plasterboard precisely.
- Trowel: For applying jointing compounds and filling gaps.
- Screwdriver: To secure plasterboard sheets to the framing.
Advanced Tools
Plasterboard lift: An invaluable tool for installing plasterboard on walls and ceilings, saving time and effort.
Jointing compound applicator: Helps apply jointing compounds evenly for seamless joint finishing.
Plasterboard rasp: To smooth rough edges and imperfections on cut plasterboard.
Safety Equipment
Dust mask: Protects against inhaling fine plaster dust during cutting and sanding.
Safety glasses: Shields the eyes from debris and dust particles.
Gloves: To protect hands from irritation and potential cuts.
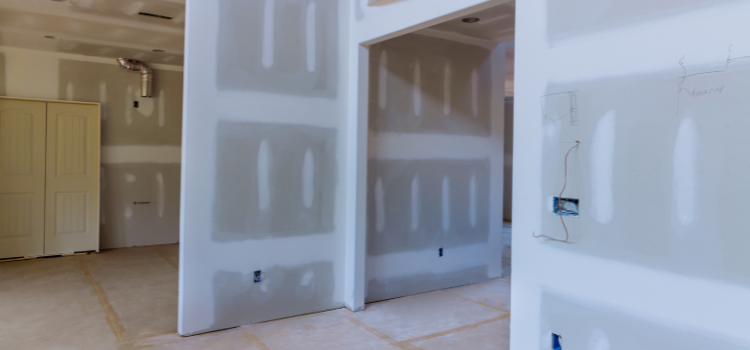
Gyprock Installation Process
Step 1: Preparing the Work Area
Before starting the gyprocking process, make sure the work area is clean, dry, and free from debris. Remove any existing wall coverings, nails, and screws. Inspect the framing to identify and fix any structural issues.
Step 2: Measuring and Cutting Plasterboard
Accurate measurements are essential for a smooth gyprocking project. Measure the dimensions of the walls and ceilings, and then mark the plasterboard accordingly. Use a utility knife or a plasterboard saw to cut the panels to the required size.
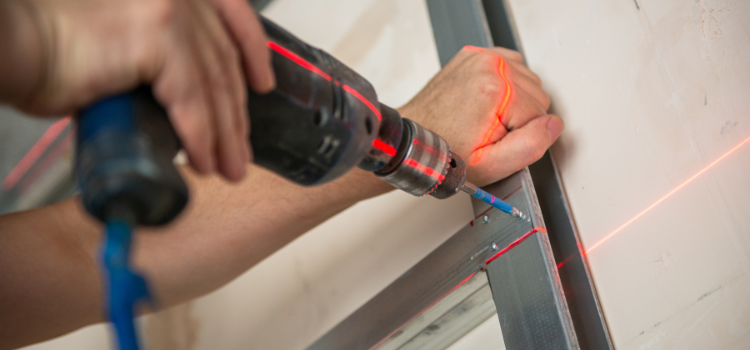
Step 3: Fixing Plasterboard to Walls and Ceilings
Begin by fixing the plasterboard to the walls. Use screws and a screwdriver to secure the panels to the framing, leaving a small gap between them to accommodate expansion. For ceilings, a plasterboard lift can make the installation process much easier.
Step 4: Taping and Jointing
Once the plasterboard is in place, cover the joints and screw indentations with jointing tape. Apply jointing compound over the tape and screws, feathering it out to create smooth transitions between panels.
Step 5: Sanding and Finishing
After the jointing compound has dried, sand the surface to achieve a seamless and even finish. Be sure to wear a dust mask and safety glasses during this step. Once the surface is smooth, it is ready for painting or any other decorative treatment.
How much does gyprocking cost?
The price of gyprocking in Australia varies depending on the type of plasterboard, the size of the area, and the complexity of the installation. On average, expect to spend between $20 to $40 per square metre for materials and labour.
Get free quotes in minutes.
Get quotes from our qualified and licensed tradies Australia-wide.
Gyprocking Tips and Techniques
Dealing with Corners and Angles
Inside corners can be challenging to achieve a seamless finish. Use metal corner beads to create clean and crisp edges, and for outside corners, try using paper-faced metal beads or plastic corner caps.
Installing Specialty Plasterboard
When installing specialty plasterboard, follow the manufacturer's guidelines for proper installation and sealing to maintain its unique properties effectively.
Soundproofing Techniques
To maximise soundproofing, install multiple layers of soundproofing plasterboard with staggered seams. Seal all joints and edges with acoustic sealant to minimise sound leakage.
Achieving a Smooth Finish
Take your time when applying jointing compound and feathering out the edges to achieve a smooth, seamless finish. Multiple thin coats are preferable to thick layers, as they’re easier to sand.
Common Gyprocking Problems
Cracks and Joint Problems
Cracks can occur due to settling or movement of the building. Make sure the framing is stable and use flexible jointing compounds to minimise crack formation.
Nail Pops and Screw Pops
Nail pops and screw pops can happen when the fasteners become loose. To fix this, re-secure the fastener and patch the area with jointing compound.
Water Damage and Mould
In moisture-prone areas like bathrooms, use moisture-resistant plasterboard and ensure proper ventilation to prevent water damage and mould growth.
Dealing with Uneven Surfaces
If the wall or ceiling surface is uneven, consider adding furring strips or shimming the framing to create a level substrate for the plasterboard.
Choosing a Contractor
Choosing the right gyprock installer is crucial for a successful and hassle-free project. Here are a few tips:
- Start by researching local contractors and checking their reputation through online reviews and recommendations.
- Ask for referrals from friends or colleagues who have had similar work done.
- Check that the contractor is licensed, insured, and has relevant experience in gyprock installation.
- When discussing the project, clearly outline your expectations and budget. A reliable contractor should provide a detailed written estimate that includes labour, materials, and any potential additional costs.
- Request a timeline for completion to avoid delays.
- Communication is key; choose a contractor who is responsive and attentive to your questions and concerns.
- Verify their track record by asking for examples of past work or a portfolio.
- Ask about the type of materials they intend to use and their approach to quality control.
- Obtaining multiple quotes allows for fair price comparisons, but avoid choosing solely based on the lowest bid – quality matters.
- Trust your instincts; select a contractor who you feel comfortable with and confident about their ability to deliver a finished product that meets your standards.
FAQs
Can I install gyprock myself?
While gyprocking can be a DIY project, it requires skill and precision to achieve a professional finish. If you're inexperienced, it's advisable to hire a professional gyprocker to ensure high-quality results.
How long does it take for gyprock to dry and set?
The drying time for jointing compound depends on the type and brand used, as well as environmental conditions. Typically, jointing compound dries within 24 hours, but it's best to wait for 48 hours before sanding and finishing.
What is the difference between gyprocking and drywall?
Gyprocking and drywalling are two terms used interchangeably to refer to the installation of plasterboard or drywall sheets. They’re the same thing, with gyprocking being a specific brand name for plasterboard in some regions.
Gyprock Plasterer Near Me
Get free quotes in minutes.
Get quotes from our qualified and licensed tradies Australia-wide.